Mountaineering Basics You Can Learn in Two Days

 While it is easy to see how the high peaks of the world have captured the attention of climbers for generations, their sheer size, sense of remoteness, and hazardous terrain can make reaching the summit seem impossible for some. At Alpenglow Expeditions, we’re here to bridge the gap between you and the peaks of your dreams, regardless of your skill level or prior experience. Here’s a brief overview of a few basic skills and techniques to get you ready to start planning your own trips to the mountains.
Getting Familiar with Your Gear
Aside from personal items and apparel (base layers, gloves, sunglasses, mountaineering boots, etc.), mountaineering requires an array of technical gear. Gaining familiarity with your kit is the first step on anyone’s journey to become a self-sufficient mountaineer. A basic mountaineering kit includes:
Backpack (35-45 liters): A sturdy, water-resistant backpack is essential for any mountaineering expedition. A strong, internal frame that fits your body will lighten the burden, especially for long days on the move. Recommended: Eddie Bauer Alchemist 40 Pack
General Mountaineering Axe: A non-technical climbing axe, usually in the range of 55-65cm long, to be used when ascending steep faces or for self-arrest in the event of a fall. Recommended: Petzl Summit
For more info on ice axes, check out our blog: “Choosing Your Ice Axe”
Mountaineering crampons: Steel crampons with anti-balling technology (to prevent snow buildup) for traveling across snow, ice, and glaciated terrain. It is important that your crampons have at least a heel bail (rear lever) that corresponds to a heel welt on your boot, as opposed to a strap-on system. Recommended: Black Diamond Sabretooth Crampons
For more info on crampons, check out our blog: “How to Pick Crampons”
Helmet: An easily adjustable, climbing-specific, lightweight helmet that fits with a hat and/or balaclava. Recommended: Petzl Meteor
Harness: Must have one or more gear loops, a belay loop, and adjustable leg loops to allow for extra layers underneath. Should be easy to pack, lightweight, and comfortable. Recommended: Petzl Altitude
Locking carabiners (2): Lightweight, small carabiners are best. Use these when building rope systems to travel as a roped team, or when hauling gear or performing a crevasse rescue. Recommended: Petzl Attache
Non-locking carabiners (2): Used in rope systems and to attach gear to your harness. Recommended: Petzl Spirit
Climbing Rope:
a) For glacier travel, we recommend a 40-60m half rope
b) For rock/technical climbing: a triple-rated single rope
c) For ultralight missions (ski mountaineering): a thin, static RAD line
Belay device: Lightweight and easy to use, with teeth/grooves for skinny ropes. Recommended: Petzl Reverso
While it’s possible to gain a basic understanding of your gear on your own, getting familiar with its application is best achieved through working with an experienced friend, mentor, or certified guide. On glaciated or snow-covered peaks, timing and efficiency is the key to success, and having your skills dialed will maximize your time spent climbing in precious weather windows.
In our 1-day Intro to Mountaineering course, you will get familiar with your gear and learn how to:
a) recognize hazards and plan your route using maps, forecasts, and terrain clues
b) use equipment such as crampons and ice axes to move over steep snow and ice
c) how to properly self-arrest in the event of a fall.
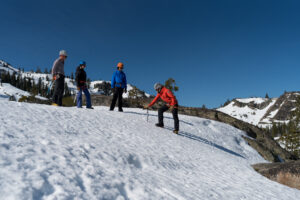
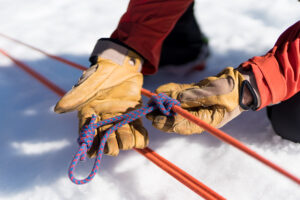
You’ll also grasp quickly that proper teamwork is essential to success in the mountains. Team dynamics play a huge role in effective ropework. To introduce these concepts, you’ll start by learning and practicing basic knots and hitches, as well as building rock and snow anchors for use in belaying and rappelling.
Becoming familiar with the gear and its basic application will ease your transition into the next step: practicing these skills and getting comfortable with your systems before applying them in real time.
Learning How & When to Use Your Gear
Once you’ve gained a basic understanding of your gear, it’s important that you learn and how and when to use it.
Choosing how to travel on glaciated terrain is often the first and most important decision you make, and whether or not you and your team are tied together will determine how you move as a group. If you are traveling over glaciated terrain where crevasses are a hazard, moving as a roped team means you’ll be ready to jump into action in the event of a crevasse fall (the traditional mountaineering approach). Or, if you are traveling over non-technical terrain where a crevasse fall is unlikely, you may choose to go unroped with rescue gear at the ready (common for heli-skiing/ski mountaineering). Your decision will depend on your goal and/or the level of perceived hazard.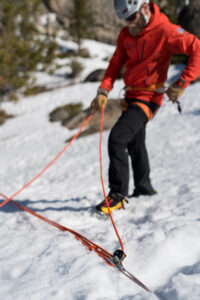
If a crevasse fall occurs, rescue timing and efficiency are paramount. As such, it is extremely important that you understand and have practiced what to do in this scenario in order to protect yourself, rescue your teammate(s), and prevent further injury.
Proper crevasse rescue involves the construction and use of intricate systems, and a well-practiced understanding of how and when to use your safety/rescue gear is essential when traveling over glaciated terrain. These skills are nearly impossible to learn and practice on your own, which is why we recommend following up our Intro to Mountaineering course with Glacier Travel & Crevasse Rescue. In this course, you will learn:
a) How to build snow anchors to support your rope system
b) Weight distribution, load transfers, and raising/lowering
c) Ascending and descending ropes to safely get in and out of a crevasse
Taking a course with a group of fellow climbers under the instruction of a certified guide is without question the best way to build your knowledge, skills, and confidence in the mountains. Traveling on glaciated terrain involves objective hazard, and learning how to read the conditions to avoid an accident, as well as knowing what to do should an accident happen, will boost your chances of success in the mountains. And more importantly, it will drastically increase the probability of a safe return home.
Taking the Fundamentals to the Mountains
After your 2-day introduction to the fundamentals, it’s time to get out there and put your skills to the test, and there is hardly a better and more accessible place to do so than on Mt. Shasta.
Located just a short distance from Lake Tahoe, Mt. Shasta truly has it all: seven glaciers, respectable altitude, epic views, and the perfect terrain to practice the mountaineering skills you’ve learned through our introductory courses. Climbing Mt. Shasta with Alpenglow Expeditions offers the chance to summit this incredible peak with guides who have years of experience and countless ascents on the mountain. With multiple ways to climb, ski, and continue to add to your skillset, joining us on Mt. Shasta is an ideal first objective on your path to become a mountaineer.
If you’re interested in learning the fundamentals of mountaineering firsthand in a location that will require you to put them to use, we offer a comprehensive 5-Day Mountaineering School on Mt. Shasta. On the northeast side of the mountain sits the Hotlum Glacier, a perfect training ground to learn and apply basic mountaineering and glacier travel skills while also getting a chance to summit a beautiful stratovolcano.
If you have an even bigger adventure in mind and you’re ready to learn the fundamentals onsite, we also offer premier climbing schools in both Ecuador and Peru. We’ve chosen these two locations for their abundance of accessible high-altitude terrain perfect for introductory mountaineering schools. Check out our blog, “How to Become a Mountaineer in Two Weeks,” to see if either of these expeditions are right for you.
For further questions about starting your mountaineering career, give us a call at 877-873-5376 or send an email to info@alpenglowexpeditions to chat with our staff.